Become a MacRumors Supporter for $50/year with no ads, ability to filter front page stories, and private forums.

Martin111

macrumors newbie
Nov 1, 2019
3
5
Having the same problem. Working on making a bunch of Bootable Installers for different versions of macOS today. High Sierra worked no problem, as did El Capitan. The sierra one was giving me the same issues as those have listed above "/Volumes/VolumeName is not a valid volume mount point" Hoping someone will post some kind of solution soon.

Also: I downloaded the installer from Apple Today (Nov 4, 2019). Fresh downloader right from Apple's website, still having the same problem.

"rickysupers" suggestion does the trick!
 
  • Like
Reactions: bigfundj

EDEL77

macrumors newbie
Nov 5, 2019
1
0
I had the same issue and found the best instruction video in youtube, just pay close attention to all spaces as it may not work.
The youtube video is here:
THANKS 9to5Mac!
 

Martin111

macrumors newbie
Nov 1, 2019
3
5
Sorry EDEL77, but this instruction will not work for the new install file of Sierra (solving the Certificate issue), witch seems to be faulty.
I created the install drive with the old install file and then replaced the install file of the drive with the new one (as "rickysuper" suggested).
Tested, and it works.
 

brianfmorris

macrumors newbie
Oct 31, 2019
6
3
I also can confirm - with installers downloaded 11/4 I was able to create El Capitan installer, but not Sierra.
 
Last edited:
  • Like
Reactions: Aguymac

bigfundj

macrumors newbie
Nov 5, 2019
4
3
I agree 100% with Martin111 that -none- of the other suggestions posted (pretty much anywhere and not just on this site) have worked except for the latest suggestion by "rickysuper". I tried it, it works, I performed a full installation on a new hard drive on a MacBook with the USB drive created using this method. No certificate issues. No error messages. Running system updates after the installation worked fine. Perfect. This is (finally) the answer.
 

e_whizz

macrumors newbie
Jul 23, 2002
9
-2
Melbourne Somewhere
As at early Novemebr 2019, the current InstallOS.dmg that you download to install Sierra has a problem. When you then run the installer the resulting Install macOS Sierra.app does not include the necessary files to make a bootable installer. It does work to install the OS though if you already have a bootable machine.

The files that are missing from the Contents/SharedSupport may include the following —
AppleDiagnostics.chunklist
AppleDiagnostics.dmg
BaseSystem.chunklist
BaseSystem.dmg

The error about 'invalid mount point', is a bit of a misnomer. Instead, the error thrown should refer to the Install MacOS Sierra.app missing the correct file. It is not a problem with the volume you are specifying to create the bootable media.
[automerge]1574337236[/automerge]
What I created as a workaround, is a fully installed Sierra boot drive that then has the Install macOS Sierra.app in its Applications folder.
You then boot from that drive, launch the Install macOS Sierra.app and then choose your desired target drive from that.

More or less achieves the same thing as a fully bootable installer and also doesn't require an internet connection to install.

You will need at least a 40GB USB drive to do this. I'd recommend a fast drive like a Samsung T5 or OWC Envoy or similar, otherwise it will take a long time to boot.
 
Last edited:

brianfmorris

macrumors newbie
Oct 31, 2019
6
3
This is a limited contribution, but for Sierra you don't necessarily need the old 10.12.6 for the @rickysuper approach to work.

I found an 'old' 10.12.5 Sierra installer, created a bootable USB with the expired installer (the createinstallmedia approach) and then as suggested copied the new installer with updated certificate to the drive.

I haven't tested installing, but I do know that I can boot from it.

In my mind the question that remains is would the same approach work with using a new El Capitan or High Sierra installer and swapping out to the Sierra OS installer....
 

bigfundj

macrumors newbie
Nov 5, 2019
4
3
In my mind the question that remains is would the same approach work with using a new El Capitan or High Sierra installer and swapping out to the Sierra OS installer....

Fascinating idea. To explore this, I mounted the bootable USB drives that I created for El Capitan, Sierra (created using createinstallmedia of the OLD installer and then moving the NEW installer to replace the installer .app), and High Sierra. I then launched Terminal (since it can easily view the hidden files) and ran through each directory to compare them. It turns out that the bootable High Sierra drive has a lot of different files, but the bootable El Capitan drive looks identical to the bootable Sierra drive. I am now going to try the idea posed by @brianfmorris and see if that works. I do anticipate having to hunt for the .plist file that "identifies" the installer app and changing it to identify "Install macOS Sierra" instead of "Install OS X El Capitan" as the installer app to launch. I'll report back.
 
Last edited:

bigfundj

macrumors newbie
Nov 5, 2019
4
3
It didn't work. I spent 3 hours diligently going through every file (hidden and not hidden) and modified many XML/plist files to match, even copied over boot.efi into the two places (pulled from the installer via Pacifist) and I get a kernel panic when I try to boot with the USB drive. Plainly put, it's not straightforward to try to use an El Capitan or High Sierra-prepared USB drive, then replace the installer with the Sierra one. Well, we tried. So either use the date change trick, or if you happen to have the "old" installer, that trick works, too (using createinstallmedia of old installer then replacing the installer app on the prepared USB drive) -- I read on another forum that the old version of the Sierra Installer is available from the App Store if you previously got it from there (I didn't so I can't try that), otherwise, you have to already have the old installer.
[automerge]1574430220[/automerge]
Or Apple could just post a Sierra Installer, with a non-expired certificate, AND a working createinstallmedia command!
 
  • Like
Reactions: Aguymac

c40v15

macrumors newbie
Nov 22, 2019
2
1
I'm damned. Two month ago I bought a new SSD (installed in the DVD drive slot) for my imac under Sierra. Since I don't have a drive, I need a bootable USB to perform the update. Just now that I got a few time for this, apple's screwing up certificates.
 

CoastalOR

macrumors 68040
Jan 19, 2015
3,022
1,147
Oregon, USA
I'm damned. Two month ago I bought a new SSD (installed in the DVD drive slot) for my imac under Sierra. Since I don't have a drive, I need a bootable USB to perform the update. Just now that I got a few time for this, apple's screwing up certificates.
Apple certificates were set to expire on 24 Oct. 2019 for Sierra, High Sierra, and Mojave and that is what happened after that date.

Do you have the old Sierra with a expired certificate on a USB installer?
 
  • Like
Reactions: Aguymac

c40v15

macrumors newbie
Nov 22, 2019
2
1
Do you have the old Sierra with a expired certificate on a USB installer?
Unfortunately not, here's how I solved my problem: I made a small partition on the HD, installed OS X on it, installed the new SSD, boot from HD, installed OS X on the SSD, deleted the small partition on the HD. What a pain in the ...

Also I put the old SSD in an external USB box and I can boot from it... Apple never disapoint when it comes to make retarded manoeuvre work like a charm and simple manoeuvre a brainf###.
 
  • Like
Reactions: Aguymac

James Mac1

macrumors newbie
Dec 6, 2019
1
0
Same problems here. Is there any news? How likely is it that Apple fixes this problem?

Unfortunately I do not have the old Sierra Installer App - but - I actually found my old High Sierra installer from Feb 2018 on my work Mac and have successfully created the bootable Flash drive with that.

However the problem is on my Home Mac which is running Sierra and not High Sierra, but will not start up.
Will High Sierra work to boot from on that Mac?

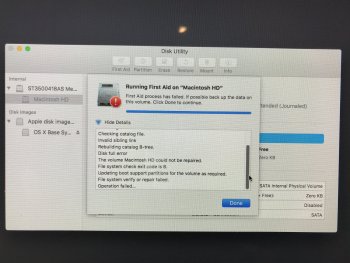
I need to access my files so I can delete some. As I think it being too full might be the reason it won't start up. By the way - First Aid fails in recovery mode (pic attached)

Thanks!
 

Attachments

  • IMG_6642.JPG
    IMG_6642.JPG
    834.6 KB · Views: 637

Supernicklas

macrumors newbie
May 22, 2009
18
2
I found a solution that worked for me!

I created an bootable USB with an old version and overwrote the Contents folder with the one from a "new" version of Sierra. Admittedly, I found an old version of MacOS Sierra on a torrent site (the official link for the old version did not work) but otherwise the process is the same.

For anybody else having this issue, here is a step by step guide.

You will need:

- A Mac.
- A USB drive (16 gb minimum). This will be reformatted, so make sure you do not have any files on it before you begin, because this process will delete all the contents of the drive.
- An older version of MacOS Sierra. I won’t link the one I found on as a torrent.
- The newest version of MacOS Sierra. I used this link on Apple’s Support site: http://updates-http.cdn-apple.com/2...5f4-0015-4c41-9f44-39d3d2aca067/InstallOS.dmg.
- Patience.

How-to:

1. Download the old macOS Sierra 10.12.5 (I used a torrent site). Once downloaded, open the .pkg file. It looks like your current system will try to install Sierra on top of your current system, but it won’t. It will simply put the “Install macOS Sierra” package in your Applications folder. We will need that in the next step.
2. Create a bootable USB with the version of Sierra in your Applications folder. I used the app Install Disc Creator. Be sure to select the correct USB drive from the drop down! Once the Install Disc Creator is done (it might take some time), it will show you a dialog box saying the install drive has been made. Close the app.
3. Let the USB drive stay in your computer.
4. Go to your Applications folder and locate the “Install macOS Sierra” folder used to create the USB drive. When you find it, delete it.
5. Download the new version of macOS Sierra from the link above.
6. Once downloaded, open the .pkg file as you did with the old version of macOS Sierra. It will now place the “new” “Install macOS Sierra” file in the Applications folder, just like before.
7. Right-click the file and select “Show package contents”.
8. Copy the “Contents” folder. This is what we need to overwrite the Contents folder currently on the USB drive.
9. Now navigate to the USB you created.
10. Right-click the “Install macOS Sierra” on the USB and select “Show package contents”.
11. Now paste the “new” Contents folder so it replaces the “old” Contents folder.

Once done overwriting, eject the USB and plug it into your Mac Pro. Boot from the USB by holding down the Option key (or Alt key on a Windows keyboard), and hopefully it will install!

Hope that helps 😌

Happy holidays.
 

akinsd

macrumors newbie
Dec 14, 2019
1
0
Replace "MyVolume" with the name of your disk

eg. If the name of your USB drive is "USB-DISK", delete "MyVolume" and type "USB-DISK"

sudo /Applications/Install\ macOS\ Catalina.app/Contents/Resources/createinstallmedia --volume /Volumes/MyVolume
sudo /Applications/Install\ macOS\ Catalina.app/Contents/Resources/createinstallmedia --volume /Volumes/USB-DISK

 
Last edited:

597wow17q

macrumors newbie
Dec 24, 2019
1
0
I found a solution that worked for me!

I created an bootable USB with an old version and overwrote the Contents folder with the one from a "new" version of Sierra. Admittedly, I found an old version of MacOS Sierra on a torrent site (the official link for the old version did not work) but otherwise the process is the same.

For anybody else having this issue, here is a step by step guide.

You will need:

- A Mac.
- A USB drive (16 gb minimum). This will be reformatted, so make sure you do not have any files on it before you begin, because this process will delete all the contents of the drive.
- An older version of MacOS Sierra. I won’t link the one I found on as a torrent.
- The newest version of MacOS Sierra. I used this link on Apple’s Support site: http://updates-http.cdn-apple.com/2...5f4-0015-4c41-9f44-39d3d2aca067/InstallOS.dmg.
- Patience.

How-to:

1. Download the old macOS Sierra 10.12.5 (I used a torrent site). Once downloaded, open the .pkg file. It looks like your current system will try to install Sierra on top of your current system, but it won’t. It will simply put the “Install macOS Sierra” package in your Applications folder. We will need that in the next step.
2. Create a bootable USB with the version of Sierra in your Applications folder. I used the app Install Disc Creator. Be sure to select the correct USB drive from the drop down! Once the Install Disc Creator is done (it might take some time), it will show you a dialog box saying the install drive has been made. Close the app.
3. Let the USB drive stay in your computer.
4. Go to your Applications folder and locate the “Install macOS Sierra” folder used to create the USB drive. When you find it, delete it.
5. Download the new version of macOS Sierra from the link above.
6. Once downloaded, open the .pkg file as you did with the old version of macOS Sierra. It will now place the “new” “Install macOS Sierra” file in the Applications folder, just like before.
7. Right-click the file and select “Show package contents”.
8. Copy the “Contents” folder. This is what we need to overwrite the Contents folder currently on the USB drive.
9. Now navigate to the USB you created.
10. Right-click the “Install macOS Sierra” on the USB and select “Show package contents”.
11. Now paste the “new” Contents folder so it replaces the “old” Contents folder.

Once done overwriting, eject the USB and plug it into your Mac Pro. Boot from the USB by holding down the Option key (or Alt key on a Windows keyboard), and hopefully it will install!

Hope that helps ?

Happy holidays.

Thanks for the instructions. I would just point out that for macOS prior to Catalina, you can still use an 8GB memory stick if you delete the old Content folder (and then empty trash) before pasting the new one.

Either by copying the content folder and replacing the destination or deleting the old content folder before pasting the new one, I was not able to boot my 2010 iMac 27" with the installer. Had to go back to my old installer to boot into the installer, change the date and start the install.
 
Last edited:

Aguymac

macrumors member
Jan 9, 2020
94
6
Hey people,

I could really use some help getting this os sierra bootable usb process to work. I've made these before, using terminal, following instructions/videos, for el capitan and yosemite too. But I can't get this to work, not for anything I'm doing wrong, but because of these issues with the certificate, and or "mount volume" error, etc.

I tried changing the date (just via system preferences though, not via terminal) and that just got me a date related error while trying to do this.

I tried several different terminal command strings, I've followed walkthroughs from youtube, and from forums like this one and none of them work.

I even tried on of the apps, disk maker x, and it couldn't get it done - for the same reasons I'd assume.

Can someone help me through this, if there is even a way to do it - cause I'm starting to think you just can't do it. And that maybe it could be done at one point but not anymore.
-I don't have an "old installer" of os sierra.
-Does the date change method require the date to be change in terminal, at the same time or as part of the os install?
-I've been on and off (mostly off, obviously) trying to figure how to get this done for...well over a year.

Late 2011 mbp, 10.11.6

Thanks.
[automerge]1578586525[/automerge]
I have the same issue. I’m quite sure, its a bug in the new installer. When I do the same command with the old installer it works.
And there is a simple trick, how to install with the old installer: set the date of the mac to somewhat in september 2019 before you start the installation.
Do you mean "set the date of the mac to somewhat in september 2019 before you start the installer download"?
I tried changing date (via sys. prefs only) before *making the bootable usb* and that didn't help, and caused a new error.
[automerge]1578586656[/automerge]
Having the same problem. Working on making a bunch of Bootable Installers for different versions of macOS today. High Sierra worked no problem, as did El Capitan. The sierra one was giving me the same issues as those have listed above "/Volumes/VolumeName is not a valid volume mount point" Hoping someone will post some kind of solution soon.

Also: I downloaded the installer from Apple Today (Nov 4, 2019). Fresh downloader right from Apple's website, still having the same problem.
Hi,
Did you figure out a solution to this yet?
Thanks.
 
Last edited:

CoastalOR

macrumors 68040
Jan 19, 2015
3,022
1,147
Oregon, USA
Hey people,

I could really use some help getting this os sierra bootable usb process to work. I've made these before, using terminal, following instructions/videos, for el capitan and yosemite too. But I can't get this to work, not for anything I'm doing wrong, but because of these issues with the certificate, and or "mount volume" error, etc.

I tried changing the date (just via system preferences though, not via terminal) and that just got me a date related error while trying to do this.

I tried several different terminal command strings, I've followed walkthroughs from youtube, and from forums like this one and none of them work.

I even tried on of the apps, disk maker x, and it couldn't get it done - for the same reasons I'd assume.

Can someone help me through this, if there is even a way to do it - cause I'm starting to think you just can't do it. And that maybe it could be done at one point but not anymore.
-I don't have an "old installer" of os sierra.
-Does the date change method require the date to be change in terminal, at the same time or as part of the os install?
-I've been on and off (mostly off, obviously) trying to figure how to get this done for...well over a year.

Late 2011 mbp, 10.11.6

Thanks.
The date change trick only works with the old Sierra installer app (downloaded before 24 Oct. 2019 and therefore has an expired certificate). Do you have the old Sierra installer or just the new one (downloaded AFTER 24 Oct. 2019)?

You can not make a USB installer with the new Sierra installer app unless you also have the old Sierra installer app.
 
  • Like
Reactions: Aguymac

Aguymac

macrumors member
Jan 9, 2020
94
6
Hi, thanks for responding so quickly.

Oh, I see.
I'm quite sure I only have the new Sierra installer.

I'd found a link to what I thought might be a 'version' that might work (can't remember the forum/reasoning) direct from apple. It downloaded a installos.img file (or something similiar) that I think was a .zip. I later followed instructions to mount/open the "installer" inside just to check the certificate date and it was definitely "new", not an old one, well.

So it just *can't* be done?

I have my stock hdd, and an ssd (which I believe is the 'startup disk', but I always just hold "option" and choose to boot from hdd, because I haven't "setup" the new ssd to use the way I want). So I have 10.11.6 on both drives right now. Certain apps are now updated to the point where I need to have a *minimum* of Sierra to get the newest versions.
I've heard, over the years, that apfs is maybe something I don't wanna switch over to. And I gathered that sierra was a better option than high sierra for me/my machine.
 

CoastalOR

macrumors 68040
Jan 19, 2015
3,022
1,147
Oregon, USA
Hi, thanks for responding so quickly.

Oh, I see.
I'm quite sure I only have the new Sierra installer.

I'd found a link to what I thought might be a 'version' that might work (can't remember the forum/reasoning) direct from apple. It downloaded a installos.img file (or something similiar) that I think was a .zip. I later followed instructions to mount/open the "installer" inside just to check the certificate date and it was definitely "new", not an old one, well.

So it just *can't* be done?

I have my stock hdd, and an ssd (which I believe is the 'startup disk', but I always just hold "option" and choose to boot from hdd, because I haven't "setup" the new ssd to use the way I want). So I have 10.11.6 on both drives right now. Certain apps are now updated to the point where I need to have a *minimum* of Sierra to get the newest versions.
I've heard, over the years, that apfs is maybe something I don't wanna switch over to. And I gathered that sierra was a better option than high sierra for me/my machine.
Follow the steps in the Apple support page:

When you get to Step 6 the "Install macOS Sierra" app will be in the Applications folder and the installer will automatically launch. Click continue and point the Sierra install to your desired disk (the SSD or HDD).
Note: The "Install macOS Sierra" app will automatically delete after the Sierra installation is completed.
Note: The "Install macOS Sierra" app is the new Sierra that has the bug and can not be used to make a USB installer.
 
  • Like
Reactions: Aguymac

Aguymac

macrumors member
Jan 9, 2020
94
6
Follow the steps in the Apple support page:

When you get to Step 6 the "Install macOS Sierra" app will be in the Applications folder and the installer will automatically launch. Click continue and point the Sierra install to your desired disk (the SSD or HDD).
Note: The "Install macOS Sierra" app will automatically delete after the Sierra installation is completed.
Note: The "Install macOS Sierra" app is the new Sierra that has the bug and can not be used to make a USB installer.
Oh, "InstallOS.dmg, that's what I meant when I said "It downloaded a installos.img file (or something similiar) that I think was a .zip.".

So I guess I have started this method, and I've already done up to step 5 or 6 then? I have "Install macOS Sierra" app in my applications folder (on the HDD), and I've copied it (the Install macOS Sierra" app) to the SSD (which already is running the same 10.11.6, just to mention).

So, I just have to run the installer app as is then, that's the only option to upgrade to Sierra. If so, are you saying that I can run this installer app, from one drive (either HDD or SSD) and "point"/install it to the other drive? Like I don't have to install it on the drive that it's on?
One reason I wanted to be able to make a bootable usb was so I could properly "wipe"/clean a drive before I clean installed sierra, like from recovery (cmd+r) - but I guess that's only doable if you have a bootable usb.

Thanks.
 

CoastalOR

macrumors 68040
Jan 19, 2015
3,022
1,147
Oregon, USA
Oh, "InstallOS.dmg, that's what I meant when I said "It downloaded a installos.img file (or something similiar) that I think was a .zip.".

So I guess I have started this method, and I've already done up to step 5 or 6 then? I have "Install macOS Sierra" app in my applications folder (on the HDD), and I've copied it (the Install macOS Sierra" app) to the SSD (which already is running the same 10.11.6, just to mention).

So, I just have to run the installer app as is then, that's the only option to upgrade to Sierra. If so, are you saying that I can run this installer app, from one drive (either HDD or SSD) and "point"/install it to the other drive? Like I don't have to install it on the drive that it's on?
One reason I wanted to be able to make a bootable usb was so I could properly "wipe"/clean a drive before I clean installed sierra, like from recovery (cmd+r) - but I guess that's only doable if you have a bootable usb.

Thanks.
You can't copy the "Install macOS Sierra" app from the HDD to the SSD because of new Sierra install app bug. If you try to launch it from SSD you will see:

Screen Shot 2020-01-09 at 10.48.50.png

You must run the "Install macOS Sierra" app from the Applications folder that InstallOS.dmg (downloaded in Step 4) and InstallOS.pkg (Step 5) was run on to create the "Install macOS Sierra" app in the Applications folder (I would recommend NOT rebooting before running the "Install macOS Sierra" app). You can select the disk to install Sierra on once you launch the the "Install macOS Sierra" app and see the window shown in Step 6 and click Continue.

If you want to do a clean install, that is more complicated because of the buggy new Sierra installer.

I would recommend booting from an El Capitan USB installer. Erase the drive you want to do the clean install, install El Capitan to the wiped drive, create your login account, boot from the new account on the freshly installed drive, then run the Sierra InstallOS.dmg (downloaded in Step 4) and InstallOS.pkg (Step 5) to create the "Install macOS Sierra" app in the Applications folder. Launch the "Install macOS Sierra" app to install Sierra. That is as close to a clean install that I can think of because the bug in the Sierra installer.

You could create a working Sierra USB installer IF you had the old Sierra installer before the certificate expired, but Apple does not provide that for download any longer.
 
Last edited:
  • Like
Reactions: Aguymac
Register on MacRumors! This sidebar will go away, and you'll see fewer ads.