Here is a list I collected for all macOS installer links from Lion to Ventura on the App Store (former iTunes Store). Most of the Installers can be installed with mas-cli. Some of them will require previous download from the App Store with that store account. For
All the official installers from
For
For
Although these installers work fine for creating a Parallels virtual machine you still might have an issue with a "broken installer" message on a real machine. For instance upgrading
Double click:
You can also do:
where
You CANNOT use the above procedure for later than

You can use @Dayo script for creation of USB installers from
This script creates a bootable disk image in the current directory from the given macOS or OS X installer app and supports
This script Creates a bootable ISO of OS X / macOS, from the installation app file from
After
And restore the contents of the ISO to the USB:
Track the progress of the command
The only black sheep here is
You can restore this DMG to an HFS+ partition. This is a never booted image of Mavericks.
For a Mavericks USB installer creation follow this :
Format an 8GB USB drive with HFS+ GUID Partition scheme and label it
Execute these commands:
Show the Hidden files. Execute this command:
In newer macOS's hold
Execute these commands:
Find your USB device and the
Execute these commands:
Take a coffee break as this command takes time. Watch the cursor at the termianl to indicate that the copy command is done.
Execute the following commands:
Boot the
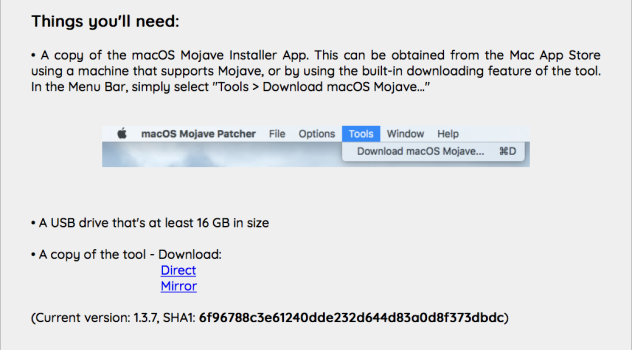
macOS's High Sierra to Ventura Apple provides only stub installers, so use gibMacOS for full installers from High Sierra to Ventura, @bogdanw script for for macOS 11.5.2 to 13.2 or Mr. Macintosh site.All the official installers from
Lion to Ventura (except Mavericks) come in the form of Install Mac OS.dmg containing InstallMacOSX.pkg installer, which by design is supposed to unarchive the installer app into the Applications folder. Here is the catch though, you can only do this on the same or earlier version of macOS. The good thing is that you can always create Lion or Mountain Lion installers in your Applications folder fairly easy and create a virtual machine in Parallels. From there you can download and install in the Applications folder any of the macOS full Installers from Lion to Sierra:For
Lion:
Code:
open -W ~/Downloads/InstallMacOSX.dmg
pkgutil --expand /Volumes/Install\ Mac\ OS\ X/InstallMacOSX.pkg  ~/Lion
cd ~/Lion/InstallMacOSX.pkg
tar -xvf Payload
mv ~/Lion/InstallMacOSX.pkg/InstallESD.dmg ~/Lion/InstallMacOSX.pkg/Install\ Mac\ OS\ X\ Lion.app/Contents/SharedSupport
mv ~/Lion/InstallMacOSX.pkg/Install\ Mac\ OS\ X\ Lion.app /Applications
rm -rf ~/Lion
For
Mountain Lion:
Code:
open -W ~/Downloads/InstallMacOSX.dmg
pkgutil --expand /Volumes/Install\ Mac\ OS\ X/InstallMacOSX.pkg ~/Mountain\ Lion
cd ~/Mountain\ Lion/InstallMacOSX.pkg
tar -xvf Payload
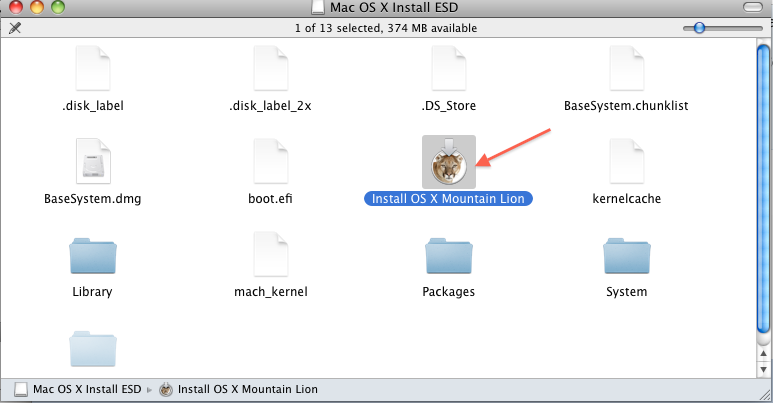
mv ~/Mountain\ Lion/InstallMacOSX.pkg/InstallESD.dmg ~/Mountain\ Lion/InstallMacOSX.pkg/Install\ OS\ X\ Mountain\ Lion.app/Contents/SharedSupport
mv ~/Mountain\ Lion/InstallMacOSX.pkg/Install\ OS\ X\ Mountain\ Lion.app /Applications
rm -rf ~/Mountain\ LionAlthough these installers work fine for creating a Parallels virtual machine you still might have an issue with a "broken installer" message on a real machine. For instance upgrading
Snow Leopard to Mountain Lion might not be possible unless you do the following:
Code:
open -W /Applications/Install\ OS\ X\ Mountain\ Lion.app/Contents/SharedSupport/InstallESD.dmgYou can also do:
Code:
installer -pkg /Applications/Install\ OS\ X\ Mountain Lion.app/Contents/SharedSupport/OSInstall.mpkg -target /Volumes/"XXX" -verboseRwhere
XXX is the name of the disk you're installing to.You CANNOT use the above procedure for later than
Mountain Lion DMG's. You can create the USB, but It will just miserably fail during installation process with the following message:You can use @Dayo script for creation of USB installers from
Lion to Monterey (excluding Mavericks) (and here with Mavericks) dowloaded from Apple or as applications in the Applications folder with the help of Balena Etcher.This script creates a bootable disk image in the current directory from the given macOS or OS X installer app and supports
Lion through Sonoma (and beyond, probably).This script Creates a bootable ISO of OS X / macOS, from the installation app file from
Mavericks to Sonoma. You can install it with Homebrew or just download the osxiso.command file and make it executable (chmod +x osxiso.command).After
ISO creation you can restore the ISO to an USB using Balena Etcher. You can also use dd just note it is extremely slow. Find the USB device with diskutil list, unmount the USB:
Code:
diskutil unmountDisk /dev/disk3
Code:
sudo dd if=~/Desktop/Mavericks.iso of=/dev/rdisk3 bs=1mdd:If not using this script all the other installers afterbrew install progress
- Progress can track progress of data transfer processes. Install with:
ps aux | grep "dd"
- Then launch dd, get its PID with:
brew install pidof
- Or with pidof
sudo progress -mp 87370
- And use the tool to track progress:
[87370] dd ~/Desktop/Mavericks.iso
- Result:
60.9% (4.4 GiB / 7.1 GiB) 5.3 MiB/s remaining 0:09:01
Mountain Lion contain the createinstallmedia program for bootable USB creation but you MUST install them in the Applications folder by double clicking or following the below procedure for Mavericks. Bare in mind that the old installers have expired certificates and you might need to change the date from recovery.The only black sheep here is
Mavericks. Apple for some unknown reason decided to skip Mavericks from the list of the available installers. So now if you want to officially install Mavericks there is only one solution. You must have "purchased" it at some point in the past to be able to redownload Mavericks from the App Store on Mavericks macOS or earlier, or using mas-cli from newer macOS's. It gets even deeper. Say you have created a regular USB installer and boot from it. It will require files update and it will force you to log in to your account verifying your "purchase" from within Recovery. Let's assume you qualify for redownload and get your copy from the App Store. So, can you reinstall it or create a working bootable USB? Not without some extra work.You can restore this DMG to an HFS+ partition. This is a never booted image of Mavericks.
For a Mavericks USB installer creation follow this :
Format an 8GB USB drive with HFS+ GUID Partition scheme and label it
Untitled.Execute these commands:
Code:
pkgutil --expand /Applications/Install\ OS\ X\ Mavericks.app/Contents/SharedSupport/InstallESD.dmg ~/MavericksShow the Hidden files. Execute this command:
Code:
defaults write com.apple.finder AppleShowAllFiles TRUE && killall FinderSHIFT+COMMAND+.Execute these commands:
Code:
cd ~/Mavericks/InstallMacOSX.pkg && hdiutil attach InstallESD.dmg
cd /Volumes/OS\ X\ Install\ ESD && cp BaseSystem.dmg ~/Mavericks/
asr imagescan --source ~/Mavericks/BaseSystem.dmg
Find your USB device and the
Apple_HFS partition on it:
Code:
diskutil list
/dev/disk19 (external, physical):
   #:                       TYPE NAME                    SIZE       IDENTIFIER
   0:      GUID_partition_scheme                        *8.0 GB     disk19
   1:                        EFI EFI                     209.7 MB   disk19s1
   2:                  Apple_HFS Untitled                7.7 GB     disk19s2
Execute these commands:
Code:
sudo asr restore --source ~/Mavericks/BaseSystem.dmg --target /dev/disk19s2 --erase
sudo unlink /Volumes/OS\ X\ Base\ System/System/Installation/Packages
cp -Rpv /Volumes/OS\ X\ Install\ ESD/Packages  /Volumes/OS\ X\ Base\ System/System/Installation
diskutil rename OS\ X\ Base\ System Install\ Mavericks
sudo bless --folder /Volumes/Install\ Mavericks/System/Library/CoreServices --label Install\ Mavericks
cp /Volumes/Install\ Mavericks/Install\ OS\ X\ Mavericks.app/Contents/Resources/InstallAssistant.icns /Volumes/Install\ Mavericks/.VolumeIcon.icns
cd "$HOME"
rm -r ~/Mavericks
Take a coffee break as this command takes time. Watch the cursor at the termianl to indicate that the copy command is done.
Execute the following commands:
Code:
cp -Rpv /Volumes/OS\ X\ Install\ ESD/BaseSystem.dmg  /Volumes/Install\ Mavericks
cp -Rpv /Volumes/OS\ X\ Install\ ESD/BaseSystem.chunklist  /Volumes/Install\ Mavericks
diskutil eject Install\ Mavericks
Boot the
Install Mavericks USB by holding OPTION key at boot time and install Mavericks. No messing with the date is needed.Attachments
Last edited:


