List members: I bought a 5 TB Western Digital external HD. My silicon iMac is running Sonoma 14.5 beta 2. Disk Utility won't format the new EHD, either in Recovery Mode or in normal operation. The error message is "Operation Failed." I would appreciate any suggestions. Thank you in advance.
Become a MacRumors Supporter for $50/year with no ads, ability to filter front page stories, and private forums.
Can't format external HD in Sonoma 14.5 beta
- Thread starter amateur12
- Start date
- Sort by reaction score
You are using an out of date browser. It may not display this or other websites correctly.
You should upgrade or use an alternative browser.
You should upgrade or use an alternative browser.
Apple asked me to reboot in Safe Mode. The external HD immediately showed up. After restarting the External HD remained visible on the desktop.
I don't know how things are today (I haven't bought a platter-based drive in years), but in the past companies like WD often installed "proprietary software" onto their drives.
Sometimes this software involved encryption or "protected partitions" that might need to be removed before the drive can be completely reformatted.
I can't answer as to whether this applies to YOUR drive.
You can find the WD drive utilities for Mac here:
 support-en.wd.com
If the drive has encryption protection or something similar on it, you can probably use the WD utilities to REMOVE such protection. After doing that, you should be able to "operate upon it" using disk utility.
Having said this, sometimes folk miss a very important step in using disk utility.
That is, you should go to the "view" menu, and choose "show all devices".
You may need to do this, to see the actual physical drive -- instead of the "logical partitions" that are ON the drive.
Can you try this now?
- connect the WD drive, let it mount on the desktop
- open disk utility
- go to the view menu and choose "show all devices"
- look at the "list on the left". Can you now see the "physical drive" itself?
Take a screenshot of disk utility, and post that here, so WE can see it.
If you can see it, click erase.
What you format the drive TO depends on what it's going to be used for.
If it's going to be used for a time machine backup, or for CarbonCopyCloner or SuperDuper, it should be formatted to APFS.
HOWEVER... if the drive is going to be used for DATA ONLY -- not a tm backup or boot drive -- then a platter based drive will work better if you format it to HFS+ (Mac OS extended with journaling enabled, GUID partition format).
If NONE of this works...
Do you have a PC running Windows available anywhere?
If so, connect it to the Windows machine, and see if it can be erased there.
If you CAN erase it on a PC, take the now-erased drive BACK TO MAC and try again to erase it to a Mac format...
Sometimes this software involved encryption or "protected partitions" that might need to be removed before the drive can be completely reformatted.
I can't answer as to whether this applies to YOUR drive.
You can find the WD drive utilities for Mac here:
How to Install and Use WD Drive Utilities Software
Find detailed answers to your support questions for your Western Digital, SanDisk, WD_BLACK, or WD storage product.
If the drive has encryption protection or something similar on it, you can probably use the WD utilities to REMOVE such protection. After doing that, you should be able to "operate upon it" using disk utility.
Having said this, sometimes folk miss a very important step in using disk utility.
That is, you should go to the "view" menu, and choose "show all devices".
You may need to do this, to see the actual physical drive -- instead of the "logical partitions" that are ON the drive.
Can you try this now?
- connect the WD drive, let it mount on the desktop
- open disk utility
- go to the view menu and choose "show all devices"
- look at the "list on the left". Can you now see the "physical drive" itself?
Take a screenshot of disk utility, and post that here, so WE can see it.
If you can see it, click erase.
What you format the drive TO depends on what it's going to be used for.
If it's going to be used for a time machine backup, or for CarbonCopyCloner or SuperDuper, it should be formatted to APFS.
HOWEVER... if the drive is going to be used for DATA ONLY -- not a tm backup or boot drive -- then a platter based drive will work better if you format it to HFS+ (Mac OS extended with journaling enabled, GUID partition format).
If NONE of this works...
Do you have a PC running Windows available anywhere?
If so, connect it to the Windows machine, and see if it can be erased there.
If you CAN erase it on a PC, take the now-erased drive BACK TO MAC and try again to erase it to a Mac format...
Fishrrman, Sorry to be late responding. It took Disk Utility two days to erase that WD drive. I used the "two-pass" option. The drive now shows up on the desktop (attached).I don't know how things are today (I haven't bought a platter-based drive in years), but in the past companies like WD often installed "proprietary software" onto their drives.
Sometimes this software involved encryption or "protected partitions" that might need to be removed before the drive can be completely reformatted.
The disk is formatted as APFS. I want to use it store data, including Time Machine backups.
Should it make make any difference if I format it in Recovery Mode, or in regular operation?
Thank you very much for your input, greatly appreciated!
I can't answer as to whether this applies to YOUR drive.
You can find the WD drive utilities for Mac here:
How to Install and Use WD Drive Utilities Software
Find detailed answers to your support questions for your Western Digital, SanDisk, WD_BLACK, or WD storage product.
If the drive has encryption protection or something similar on it, you can probably use the WD utilities to REMOVE such protection. After doing that, you should be able to "operate upon it" using disk utility.
Having said this, sometimes folk miss a very important step in using disk utility.
That is, you should go to the "view" menu, and choose "show all devices".
You may need to do this, to see the actual physical drive -- instead of the "logical partitions" that are ON the drive.
Can you try this now?
- connect the WD drive, let it mount on the desktop
- open disk utility
- go to the view menu and choose "show all devices"
- look at the "list on the left". Can you now see the "physical drive" itself?
Take a screenshot of disk utility, and post that here, so WE can see it.
If you can see it, click erase.
What you format the drive TO depends on what it's going to be used for.
If it's going to be used for a time machine backup, or for CarbonCopyCloner or SuperDuper, it should be formatted to APFS.
HOWEVER... if the drive is going to be used for DATA ONLY -- not a tm backup or boot drive -- then a platter based drive will work better if you format it to HFS+ (Mac OS extended with journaling enabled, GUID partition format).
If NONE of this works...
Do you have a PC running Windows available anywhere?
If so, connect it to the Windows machine, and see if it can be erased there.
If you CAN erase it on a PC, take the now-erased drive BACK TO MAC and try again to erase it to a Mac format...
Attachments
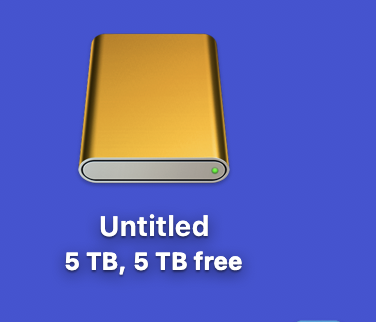
I meant, "partition" it. I think I need three partitions. Thanks again.Fishrrman, Sorry to be late responding. It took Disk Utility two days to erase that WD drive. I used the "two-pass" option. The drive now shows up on the desktop (attached).
The disk is formatted as APFS. I want to use it store data, including Time Machine backups.
Should it make make any difference if I format it in Recovery Mode, or in regular operation?
Thank you very much for your input, greatly appreciated!
There's nothing wrong with 3 partitions.
Just be sure that the partition for time machine is about 2x the size of your internal drive (or even larger if you wish). TM needs a lot of "extra room". (I don't use it)
Having said that... if you haven't done the partitioning yet, here's how I'd do it:
a. connect the drive, open disk utility.
b. format THE ENTIRE DRIVE to HFS+ (Mac OS extended, journaling enabled, GUID partition format)
c. I'd let the "first partition" become the tm backup (we'll get back to that in a moment)
d. now, create the second partition. Give it any name you wish. Let it REMAIN as HFS+.
e. once that's done, repeat the process for the third partition.
f. Now, exit the partition panel, just get back to disk utility's "main" panel.
g. in "the list on the left", click ONE TIME on the first partition to select it -- this is the one that's going to be used by time machine.
h. go up to the "edit" menu and choose "convert to APFS".
i. disk utility should work its magic, and convert the first partition into an APFS "container", LEAVING THE OTHER TWO PARTITIONS ALONE.
This should do it.
Now the first partition is ready for tm (being APFS).
And the 2nd and 3rd partitions are HFS+, which is best for general storage (of either apps or "just files")...
Fisherman: Following your suggestions, everything is working perfectly. I can't thank you enough!There's nothing wrong with 3 partitions.
Just be sure that the partition for time machine is about 2x the size of your internal drive (or even larger if you wish). TM needs a lot of "extra room". (I don't use it)
Having said that... if you haven't done the partitioning yet, here's how I'd do it:
a. connect the drive, open disk utility.
b. format THE ENTIRE DRIVE to HFS+ (Mac OS extended, journaling enabled, GUID partition format)
c. I'd let the "first partition" become the tm backup (we'll get back to that in a moment)
d. now, create the second partition. Give it any name you wish. Let it REMAIN as HFS+.
e. once that's done, repeat the process for the third partition.
f. Now, exit the partition panel, just get back to disk utility's "main" panel.
g. in "the list on the left", click ONE TIME on the first partition to select it -- this is the one that's going to be used by time machine.
h. go up to the "edit" menu and choose "convert to APFS".
i. disk utility should work its magic, and convert the first partition into an APFS "container", LEAVING THE OTHER TWO PARTITIONS ALONE.
This should do it.
Now the first partition is ready for tm (being APFS).
And the 2nd and 3rd partitions are HFS+, which is best for general storage (of either apps or "just files")...

HDFan, Thank you very much!Make sure you have a 3-2-1 backup strategy in place.
Register on MacRumors! This sidebar will go away, and you'll see fewer ads.