Hey all,
I've modified the passive thermal system to improve the cooling of the CPU of my 2015 Retina MacBook following these instructions: https://www.reddit.com/r/macbookrepair/comments/ldbye3 .
As this original reddit post lacks of photos, I've decided to share there how it went for me:
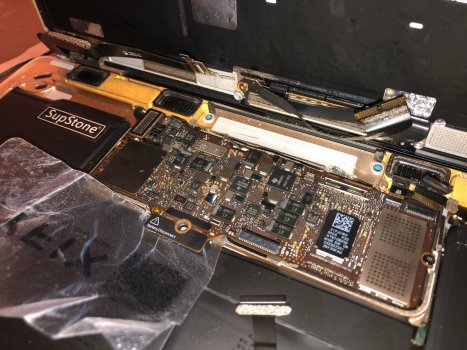
Here's the MacBook open with a plastic card to disconnect the battery. The button to power it off, next to the battery connector didn't work for me.

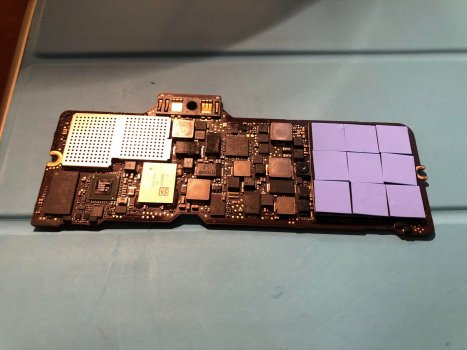
Here's the extracted logic board:

Let's remove the CPU heatsink

and clean the old thermal past

Then apply some new one

After that, I placed the two thin copper plates on the top of the CPU, and applied thermal past on the back of the heatsink as well

Here is the heatsink back in place


Now, we can put thermal pads on the top of the heatsink

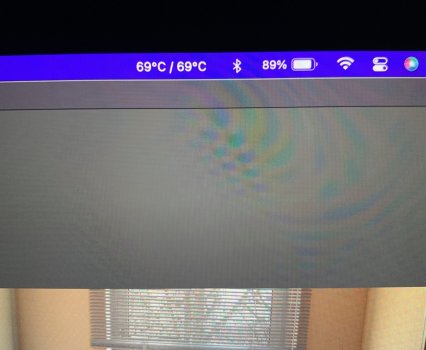
Eventually, here's the MacBook working again:

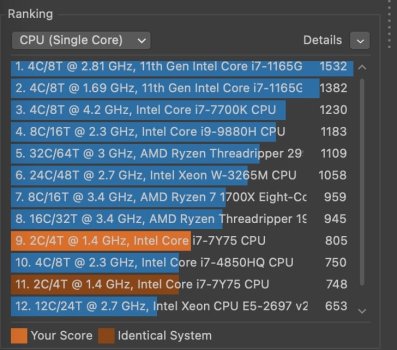
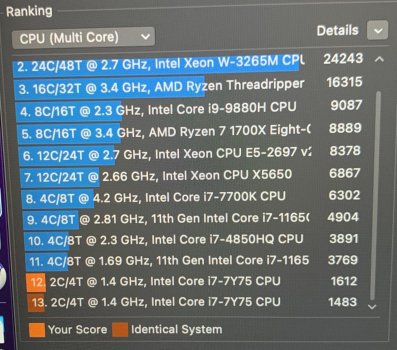
Conclusion: the MacBook case is now warmer, but the CPU is way cooler, so its frequency remains high.
It should prevent CPU and SSD failings. However, the battery may die sooner as it doesn't like heat. But it's (way) cheaper to replace the battery than the logic board.
I've modified the passive thermal system to improve the cooling of the CPU of my 2015 Retina MacBook following these instructions: https://www.reddit.com/r/macbookrepair/comments/ldbye3 .
As this original reddit post lacks of photos, I've decided to share there how it went for me:
Here's the MacBook open with a plastic card to disconnect the battery. The button to power it off, next to the battery connector didn't work for me.
Here's the extracted logic board:
Let's remove the CPU heatsink
and clean the old thermal past
Then apply some new one
After that, I placed the two thin copper plates on the top of the CPU, and applied thermal past on the back of the heatsink as well
Here is the heatsink back in place
Now, we can put thermal pads on the top of the heatsink
Eventually, here's the MacBook working again:
Conclusion: the MacBook case is now warmer, but the CPU is way cooler, so its frequency remains high.
It should prevent CPU and SSD failings. However, the battery may die sooner as it doesn't like heat. But it's (way) cheaper to replace the battery than the logic board.